
The Security Deposit Screen is designed to hold funds on the guest's credit card throughout their stay, validate the guest's payment method, and offer a damage waiver option. This screen ensures that you have financial protection against potential damages and that the guest's credit card is legitimate and has sufficient funds.
Key Features of the Security Deposit Screen
-
Payment Validation:
- Validates the guest's credit card at the time of guest portal completion by pre-authorizing a symbolic amount of $2. This ensures that the card is legitimate and has funds.
-
Security Deposit:
- Holds a specified amount on the guest's credit card for the duration of their stay. The hold begins X (between 1 and 7 days of your choosing) before check-in, and is automatically renewed every 5-7 days (depending on the credit card used) until X days (1-7 of your choosing) after checkout. If damage is found, the property manager may claim the hold up to the maximum amount held. Learn more about managing security deposits here.
-
Damage Waiver:
- Offers guests a non-refundable payment option as an alternative to the larger security deposit hold. This option covers accidental damages up to a specified amount and generates ancillary revenue.
-
Customizable Settings:
- Property managers can set the preauthorization, security deposit and/or damage waiver functions based on the account level, listing level, or by booking source.
- Property managers may customize the desired amounts for the security deposit and/or damage waiver by risk color or by listing.
Setting Up the Security Deposit Screen
Customizing the Security Deposit Screen in Autohost is a straightforward process. Here’s how you can do it:
-
Log into Your Autohost Account:
- Navigate to Guest Portal > Add-ons.
-
Enable Security Deposits:
- Toggle on the Security Deposits option.

- Toggle on the Security Deposits option.
-
Choose desired Security Deposit settings:
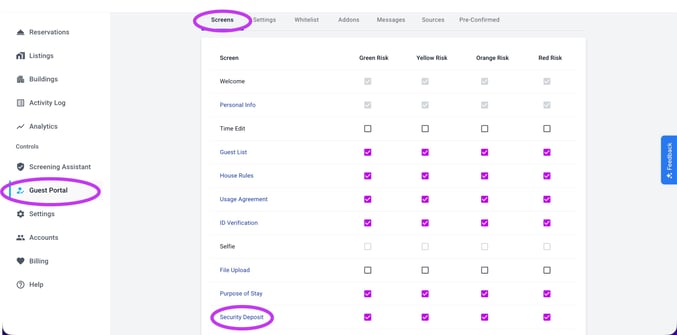
- Navigate to Guest Portal > Screens > Security Deposit.
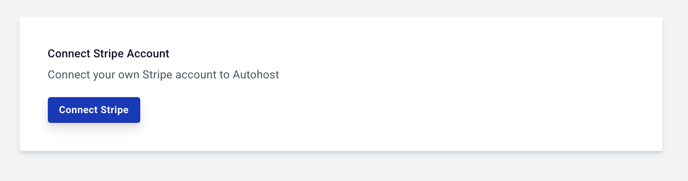
- Connect to your company's Stripe account:
- To utilize Security Deposits or Damage Waivers, you must utilize Payment Validation
- Payment validation is enabled by default if the Security Deposit screen is enabled (either on the account level or the listing level). The default pre-authorization amount can not be changed and is set to $2, which is used to validate the guest's credit card without charging it.
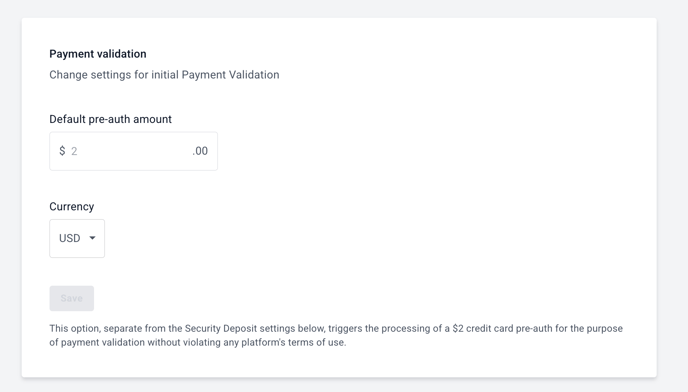
- Payment validation is enabled by default if the Security Deposit screen is enabled (either on the account level or the listing level). The default pre-authorization amount can not be changed and is set to $2, which is used to validate the guest's credit card without charging it.
- Select the desired currency.
- To utilize the Security Deposit setting, toggle the 'Enable Security Deposit' toggle.
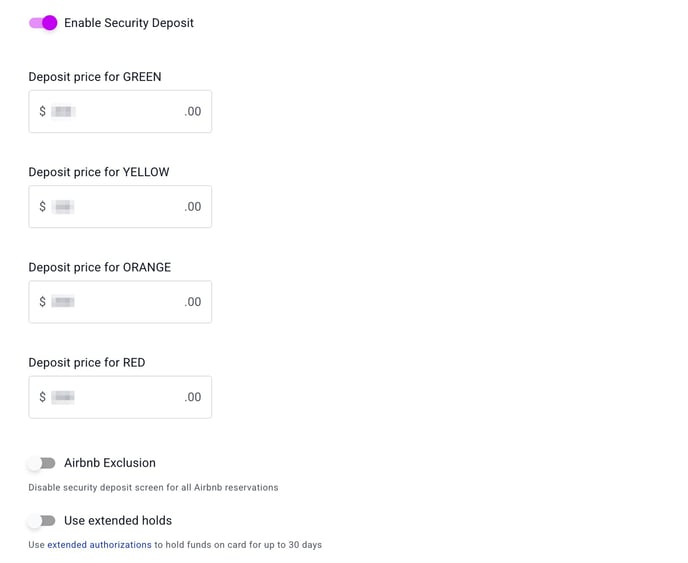
- Enter the desired hold amounts by risk color.
- If desired, enable Airbnb Exclusion:
Although Airbnb does allow software-connected Hosts to charge a security deposit outside the platform, you have the option to disable the Security Deposit screen for all Airbnb reservations. For more info on Abiding by Airbnb's Off-Platform Policy, read this article.
- If desired, enable 'Use extended holds', to learn more, read this article.
- Navigate to Guest Portal > Screens > Security Deposit.
- Damage Waivers are offered as an alternative to Security Deposits, therefore, the Security Deposit must be enabled, to utilize the Damage Waiver. If desired, toggle the 'Enable damage waiver' toggle.

-
Once enabled, toggle the risk colors you'd like to offer the damage waiver alternative (to the security deposit) to:
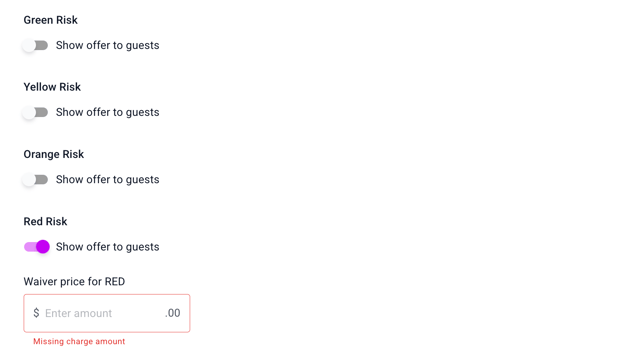
- Enable the specific risk colors and choose the specified amount. Since this fee is non-refundable, it should be less than the specified security deposit amount of the same risk color.
- Add a link to your own 'Terms and Conditions' page that specifies what the damage waiver covers and the amount it covers. Click here for an example TOS page.
-
- Save the Configuration: Click "Save" to finalize your settings.
Note: A credit card authorization can fail for many reasons. Learn about them by reading this informative article written by Stripe: Decline codes