
For Microsoft Outlook:
Add Autohost to your Safe Senders list
- Click on the gear icon at the top right.
- Click "View all Outlook settings".
- Click "Mail".
- Click "Junk email".
- Under "Safe senders and domains", click "Add.
- Enter the following domain: autohost.ai
- Press enter on your keyboard.
- Click "Save".
Please note: Instructions may vary depending on your version of Outlook. For more information, check out Microsoft Support.
For Gmail:
Note: This may be a job for your email/IT team. Regardless of your email service provider, request that your team do at least one of the following:
- Add Autohost's email domain to your organization's whitelist. This tells your email server that it should expect to receive emails from any from address containing that domain (e.g., autohost.ai).
- Add Autohost's sending IP addresses to your organization's whitelist.
G Suite admin:
As a G Suite administrator, you can help ensure that messages received from specific email domains/sending IP addresses don't get marked as spam for your domain.
Add Autohost to your list of approved senders that bypass spam filter (*recommended)
- Make sure that you have an administrator account.
- From the Admin console Home page, go to "Apps" > "G Suite" > "Spam, Phishing and Malware".
Note: You might find this at "Apps" > "G Suite" > "Gmail" > "Advanced Settings" instead. - On the left, select an organizational unit.
- Point to "Spam" and click "Configure".
If the setting is already configured, go to the setting and click "Edit" or "Add Another". - For a new setting, enter a unique name or description.
- Check the "Bypass spam filters for messages received from addresses or domains within these approved senders lists" box.
- Click "Use existing list" or "Create or edit" list to select an existing list, or create a list of approved senders. To add a new list:
- Click "Create" or "Edit list".
- Scroll to the bottom of "Manage address lists", and click "Add address list".
- Enter a name for the new list.
- Click "Add address".
- Enter email addresses or domain names. Use a space or comma between each entry.
- *Optional* To bypass this setting for approved senders that don’t have authentication, you can turn off "Authentication required" for each user. This bypasses SPF and DKIM authentication.
- Click "Save" to save the new address list.
- *Optional* To turn on other spam filter options, check the box next to each option.
- At the bottom of the settings page, click "Save" to save the new spam setting.
-
It can take up to 24 hours for your changes to take effect. (Track changes in the Admin console audit log.)
OR add the necessary IP addresses to your whitelist
- Make sure that you have an administrator account.
-
From the Admin console Home page, go to "Apps" > "G Suite" > "Gmail" > "Advanced settings".
Tip: To see Advanced settings, scroll to the bottom of the Gmail page.
-
On the left, select the top-level organization, typically your domain.
-
In the "Spam, phishing, and malware" section, scroll to the "Email whitelist" setting. Or, in the search field, enter: email whitelist
-
Enter the following IP addresses:
- 54.174.60.0/23
- 143.244.80.0/20
- 18.208.124.128/25
- 54.174.53.128/30
- 158.247.16.0/20
- 54.174.59.0/24
- 54.174.63.0/24
- 3.93.157.0/24
- 54.174.52.0/24
- 139.180.17.0/24
- 54.174.57.0/24
Note: Since you're adding more than one IP address, separate each with a comma.
Remember: Ensure that you enter the full list of sending IP addresses, including the single addresses and the ranges of addresses. -
At the bottom of the Gmail Advanced settings page, click "Save.
-
It can take up to 24 hours for any changes to take effect. (Track changes in the Admin console audit log.)
Please note: These instructions were taken from Google Help. For more troubleshooting tips, check out this article.
G Suite users:
If you don't have a G Suite admin account, here's what you can do:
Mark Autohost emails as "Not spam"
- Log into your Gmail account.
- On the left, find the "Spam" folder, under "More".
- Search for the Autohost email that was reported as spam.
-
Click to open the email.
-
Below the search bar, click "Not spam" to bring the email into your inbox.
If the email content is still blocked...
1. Find the email.
2. Click on the three dots at the top right.
3. Click "Report not phishing".

Create a filter to keep Autohost emails from your spam folder
- Log into your Gmail account.
- Click on the gear icon at the top right, then click "See all settings".
- Go to "Filters and Block Addresses".
- Click to "Create a new filter".
- In the "From" section, enter: *@autohost.ai
- Click "Create filter".
- Check "Never send it to Spam".
- Click "Create filter."
Important note:
Before opening or clicking on the content of an email, make sure it was actually sent from Autohost.
*See below the email to register for Autohost's help center:
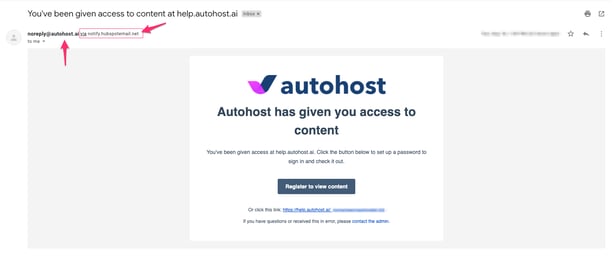
You'll notice the email is sent from Autohost's domain (noreply@autohost.ai, support@autohost.ai, etc.) via '______.hubspotemail.net'.