
You can use the Autohost Webhooks Zap to send customer and verification data to your CRM, Microsoft Teams and other business apps in two minutes.
Create a new Zap
Login to your Zapier account and click "Create Zap". Then you will see the following screen to configure the first step.
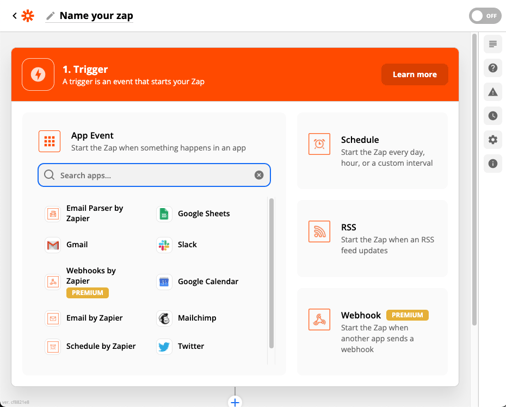
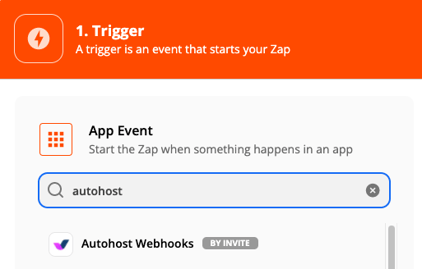
Search for "Autohost Webhooks" in the App Event search and select it, as seen in the next screenshot:

Next, you'll need to select which kind of Trigger Event you want. Currently we offer two options:
- Verification Status Changed: Trigger any time the Screening AI run a risk analysis on a transaction or reservation.
- Guest Portal Submission: Trigger any time the Guest Portal was completed by a customer.
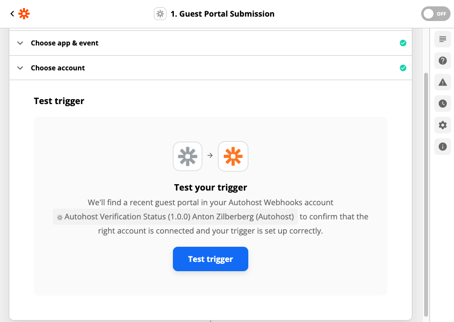
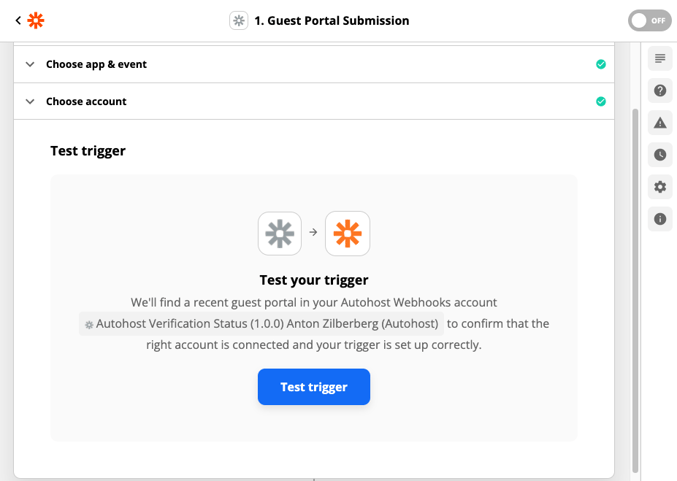
Select the desired trigger event. For illustration purposes, we will use Guest Portal Submission:
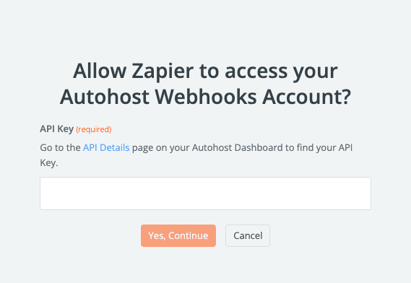
Now, you will need to configure your Autohost authentication to connect Zapier to your account. To do that we will create a new API key on Autohost. Login to your Autohost account, then navigate to Settings > API and click Create Key.
Copy the new API key. Now, return to Zapier, and click Sign in to Autohost. Once you do this, a new browser window will open, as shown in the next screenshot. On this page, you will be asked to enter the API key you just created. Once complete, click Yes, Continue to save and test the connection.
Click Test Trigger to finish creating the first event.
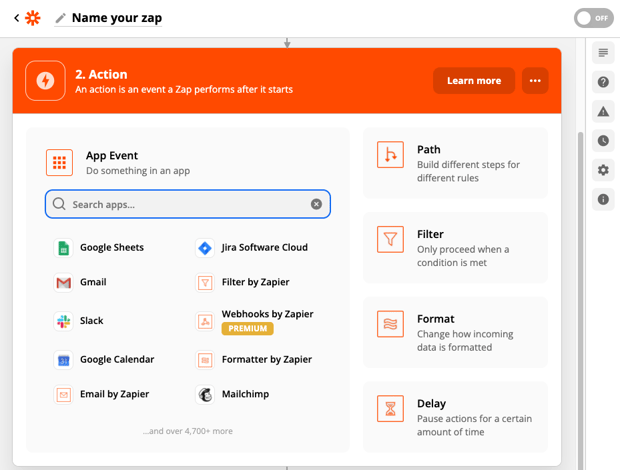
Now, the fun part. You get to choose where to send your Autohost events to.
Here are some common use-cases:
- Send customer contact info to a Sales and CRM solution, such as SalesForce or ZoHo.
- Slack or Microsoft Teams notifications to leave flowers when a customer selects "anniversary" for travel reason.
- Send SMS with Twilio or Emails with Gmail.
- Create drip emails and other marketing campaigns.
- Log activity to a file on Google Drive.
Connect your Zap to a destination
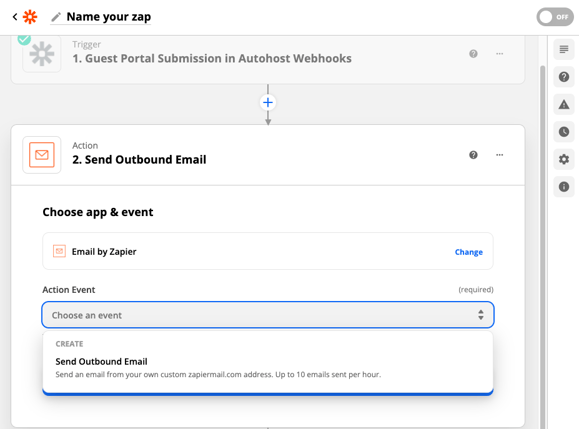
For the remainder of this guide, we will use a simple action: sending email. As seen in the screenshot below, search for "Email by Zapier" and select "Send Outbound Email" for Action Event. Click continue.
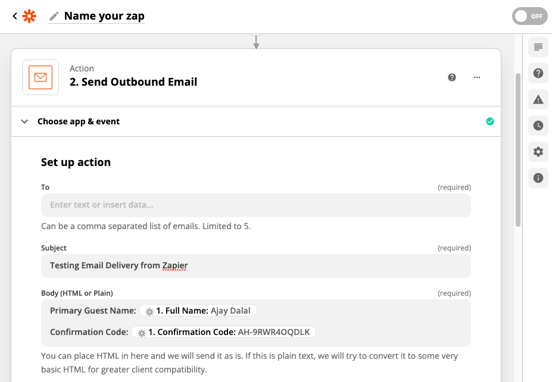
Lastly, you will configure your email message template. At minimum, you will need to configure the following:
- Destination (To) address
- Subject
- Body of email
See following screenshot as an example:
Once you've created your email template, click continue. You will then be asked to run a test, which will trigger an email. To turn on your new automation, click Enable Zap. Don't forget to name your Zap.
Quick Start